Network Reconnaissance
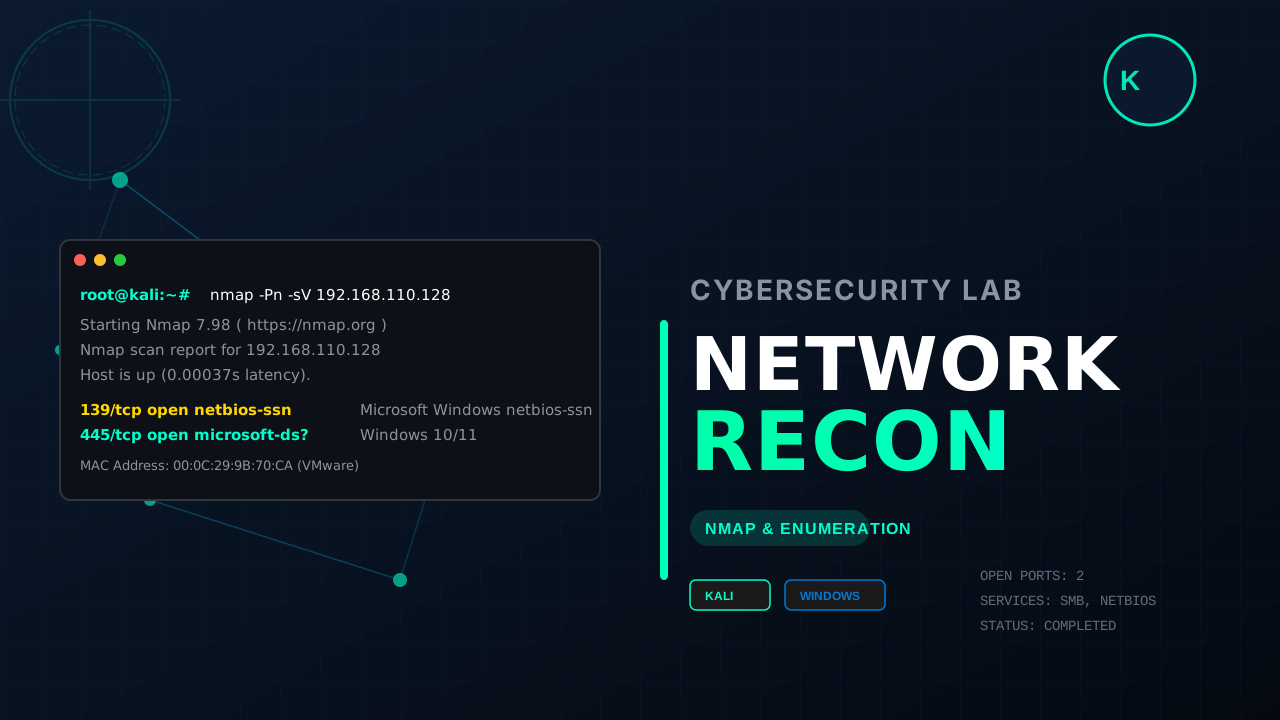
Complete guide from theory to hands‑on lab with Kali Linux & Windows
 Updated: July 2026
 30 min read
 Level: Intermediate
 Tools: Nmap, Kali, Windows
 Table of Contents
1. What Is Network Reconnaissance?
Network reconnaissance (often called network recon) is the first phase of any cybersecurity assessment or penetration test. It involves gathering information about a target network, its hosts, open ports, running services, and potential vulnerabilities — all without yet exploiting anything. Think of it as digital cartography: you map the terrain before you move.
In ethical hacking, recon is split into two broad categories: passive (gathering data from public sources, OSINT) and active (directly interacting with the target, e.g., sending packets). This guide focuses on active network reconnaissance using industry‑standard tools like Nmap within a safe, virtualized lab environment.
 Why it matters: According to the Verizon DBIR, over 80% of breaches involve some form of reconnaissance. Attackers spend significant time mapping networks before striking. Understanding recon is essential for defenders — you can’t protect what you don’t know exists.
In this guide, we’ll walk through a complete lab where a Kali Linux machine scans a Windows target, identifies open ports (139, 445), and extracts service information. You’ll learn the commands, the logic behind them, and how to interpret results. We’ll also cover pros and cons of active scanning, best practices, and answer the most frequently asked questions.
Whether you’re studying for certifications like CEH, OSCP, or just building your home lab skills, this guide gives you a solid foundation. Let’s dive in.
2. Types of Network Reconnaissance
Reconnaissance isn’t a one‑size‑fits‑all activity. Security professionals and attackers alike use different approaches depending on the goal, the target’s defenses, and the level of stealth required.
2.1 Passive Reconnaissance
Passive recon involves collecting information without directly interacting with the target systems. You’re essentially a digital eavesdropper. Examples include:
- OSINT – searching public records, social media, job postings, and domain registrations.
- DNS enumeration – querying public DNS servers for subdomains and MX records.
- Search engine dorking – using advanced Google operators to find exposed documents or login pages.
- Certificate transparency logs – discovering hostnames from SSL/TLS certificates.
Passive recon is stealthy and leaves almost no trace in target logs. It’s often the first step in a sophisticated attack.
2.2 Active Reconnaissance
Active recon means sending packets to the target and analyzing the responses. This is what most people picture when they hear “network scanning.” Techniques include:
- Ping sweeps – ICMP Echo requests to discover live hosts.
- Port scanning – probing TCP/UDP ports to see which are open.
- Service/version detection – banner grabbing and protocol analysis.
- OS fingerprinting – using TCP/IP stack quirks to guess the operating system.
Active scanning is more accurate but also noisier. It can trigger intrusion detection systems (IDS) and is generally logged by the target. In our lab, we use active scanning with Nmap — the de facto standard for this task.
2.3 External vs. Internal Recon
Recon can also be classified by the vantage point:
- External – performed from outside the target network (e.g., the internet). Scans are constrained by firewalls and NAT.
- Internal – performed from inside the network, after initial compromise or during an insider threat assessment. Internal scans are often more revealing because firewalls are less restrictive.
Our lab simulates an internal scenario: both Kali and Windows reside on the same NAT subnet, so there’s no firewall blocking the scan.
3. The Reconnaissance Process
A methodical approach ensures you don’t miss critical information. While every engagement is unique, most network recon workflows follow these stages:
- Scope definition – determine the target IP range, hosts, or domains. Define rules of engagement (ROE) for authorized testing.
- Host discovery – identify which IP addresses are alive (e.g., using ping, ARP, or TCP SYN scans).
- Port scanning – for each live host, probe common ports to see which services are listening.
- Service & version detection – for open ports, send probes to determine the exact software and version (e.g., SMB 3.1.1, Apache 2.4.54).
- OS fingerprinting – infer the operating system based on network behavior.
- Vulnerability mapping – correlate services with known CVEs (optional, often done in later phases).
In this lab, we’ll execute steps 2–4 using Nmap, with a focus on port scanning and service detection.
4. Tools for Network Reconnaissance
While many tools exist, the following are the most widely used in professional and educational settings:
- Nmap – the Swiss Army knife of network scanning. Supports host discovery, port scanning, version detection, OS fingerprinting, and scripting (NSE).
- Netcat – a simple utility for reading/writing network connections; useful for manual banner grabbing.
- Masscan – asynchronous scanner that can scan the entire internet in minutes; good for large‑scale recon.
- Wireshark – packet analyzer that helps you see exactly what’s being sent/received during scans.
- Metasploit – includes auxiliary modules for recon (e.g., port scanners, SMB version detection).
- Zenmap – GUI front‑end for Nmap, useful for beginners.
In our lab, we rely solely on Nmap because it’s lightweight, powerful, and available on every penetration testing distribution. We’ll use the terminal version to keep things clear and reproducible.
5. Lab Setup – Environment & Configuration
Before running any commands, let’s define the lab environment. All machines run inside VMware Workstation Player on a Windows host. This provides isolation from the physical network.
5.1 Hardware & Software
- Host machine: Windows 11 laptop with 16 GB RAM, 4‑core CPU.
- Virtualization: VMware Workstation 17 Player (non‑commercial).
- Attacker VM: Kali Linux 2026.1 (minimal installation).
- Target VM: Windows 10/11 (or Windows Server 2022 Evaluation).
- Network type: NAT (VMnet8) – both VMs share the same subnet.
5.2 IP Addressing
After booting both VMs, we verify their IPs using ip a (Kali) and ipconfig (Windows). From the attached screenshots:
 Kali IP: 192.168.110.133
ip a Windows IP: 192.168.110.128
ipconfig VM Setup
Both machines are on the same /24 subnet (255.255.255.0) with the gateway at 192.168.110.2. This ensures direct layer‑2 communication, which makes ping and Nmap scans straightforward.
6. Step‑by‑Step Lab Walkthrough
We’ll now execute the reconnaissance step by step, exactly as shown in the lab report. Each command is explained so you can replicate it in your own environment.
Step 1 Start both VMs – boot Kali and Windows. Log in to each.
Step 2 Verify IP addresses – on Kali, run ip a; on Windows, run ipconfig. Confirm they are in the same subnet.
Step 3 Test connectivity with ping – from Kali, ping the Windows IP. This verifies layer‑3 reachability and measures latency.
The TTL value (128) suggests the target is Windows (Linux typically shows 64). Zero packet loss confirms a healthy connection.
Step 4 Run the Nmap service scan – execute nmap -Pn -sV 192.168.110.128. Let’s break down each flag:
-Pn– skip host discovery (assume the host is up). This forces Nmap to scan even if it doesn’t respond to ping. Useful when ICMP is blocked.-sV– enable version detection. Nmap sends additional probes to open ports to determine the service name and version.192.168.110.128– the target IP.
Step 5 Analyze the output – Nmap found two open TCP ports:
- 139/tcp – NetBIOS Session Service (used for file sharing, named pipes, and SMB over NetBIOS).
- 445/tcp – Microsoft Directory Services (SMB over TCP/IP, modern file sharing).
The scan also provides the MAC address (00:0C:29:9B:70:CA), which confirms the target is a VMware virtual machine. The OS is correctly identified as Windows.
7. Results & Analysis
The Nmap scan successfully enumerated the Windows target’s network footprint. Let’s interpret the findings in a broader security context.
7.1 Open Ports and Services
Port 139 (NetBIOS‑SSN) and port 445 (SMB) are classic Windows file‑sharing ports. In many enterprise environments, these are left open to facilitate network drives, printer sharing, and legacy applications. However, they are also historically associated with major ransomware attacks (e.g., WannaCry, EternalBlue). Even though the system appears patched (it’s a modern Windows build), the presence of these ports signals a potential attack surface.
From a defender’s perspective, this scan tells us:
- File sharing is enabled and accessible from the internal network.
- If the network has weak access controls, an attacker could attempt to connect to SMB shares, brute‑force credentials, or exploit misconfigurations.
- Further enumeration (e.g.,
nmap --script smb-enum-shares) could reveal exposed folders.
7.2 OS Fingerprinting
Nmap’s service detection combined with TCP/IP stack analysis (done implicitly) points to a Windows system. The TTL value from the ping test (128) corroborates this. This information is valuable for an attacker because Windows and Linux have very different exploit landscapes.
7.3 What About the Other 998 Ports?
Nmap reported “Not shown: 998 closed tcp ports (reset)”. This means 998 other TCP ports were scanned and returned a TCP RST packet, indicating no service is listening. Nmap’s default scan covers the 1000 most common ports. To scan all 65535 ports, you would use -p- (though that takes much longer).
 Security Takeaway: The open SMB ports (139, 445) are a prime target for attackers. Even if the system is fully patched, misconfigurations (like null session access) can lead to data exposure. Regular scanning of your own infrastructure helps you catch such exposures before the bad guys do.
8. Pros and Cons of Active Network Reconnaissance
Active scanning is a double‑edged sword. It provides rich, accurate data but comes with operational risks. Below is a balanced breakdown.
 Advantages
- Accuracy – active probing gives you definitive answers about open ports and services.
- Speed – modern tools like Nmap can scan thousands of hosts in minutes.
- Depth – version detection and NSE scripts reveal detailed information (e.g., SMB shares, SSL certificates).
- Automation – scanning can be scripted and integrated into CI/CD or monitoring pipelines.
- Baseline creation – regular scans help you build a security posture baseline.
 Disadvantages
- Noisy – active scans are easily detected by IDS/IPS and SIEM systems.
- Legal & ethical risks – scanning without permission is illegal in many jurisdictions.
- False positives – some services may respond to probes but be behind access controls.
- Network disruption – aggressive scanning (e.g., full‑port SYN floods) can crash fragile devices.
- Firewall evasion – results may be incomplete if the target uses stateful firewalls or host‑based IPS.
In a professional penetration test, the pros generally outweigh the cons if you have proper authorization and use conservative scan settings. For our lab, the benefits are clear: we learn the mechanics of scanning in a safe, isolated environment.
9. Best Practices for Network Reconnaissance
Whether you’re a blue teamer, red teamer, or just learning, these guidelines will help you get the most out of your recon efforts while minimizing risks.
- Always get written authorization – before scanning any network that isn’t your own. This is non‑negotiable.
- Use a dedicated lab environment – like the VMware setup described here. Never scan production systems without explicit permission.
- Start with a ping sweep – to identify live hosts before diving into deep port scans. This reduces noise.
- Use appropriate scan timing – Nmap’s
-Tflag (e.g.,-T4for faster,-T2for stealthier) helps you balance speed and evasion. - Combine with OSINT – passive recon often reveals domain names, employee emails, and other context that makes active scanning more targeted.
- Document everything – keep a log of all commands, outputs, and timestamps. This is crucial for reporting and reproducibility.
- Validate results – cross‑check Nmap’s findings with other tools (e.g.,
nc -zvor a quick Wireshark capture). - Respect rate limiting – if you’re scanning a production network, use
--max-rateto avoid overwhelming the target.
10. Frequently Asked Questions (FAQs)
Here are 20 common questions about network reconnaissance, answered concisely for quick reference.
-Pnflag do in Nmap?-p- flag. Example: nmap -p- 192.168.110.128. Be aware that this takes significantly longer than the default 1000‑port scan.-O flag triggers this.-Pn and -sS (stealth SYN) are sometimes used to evade detection.-sV automates this.-sU flag. Example: nmap -sU 192.168.110.128. UDP scans are slower and less reliable because UDP is connectionless.--script smb-enum-shares.-oN (normal), -oX (XML), or -oG (grepable) flags. Example: nmap -sV 192.168.110.128 -oN scan.txt.-sS) sends a SYN packet and completes the handshake only if a SYN‑ACK is received; it’s stealthier. TCP connect (-sT) uses the OS’s connect() syscall and is fully logged.-sN) sends a TCP packet with no flags set. It’s used to map out firewall rules; some systems will respond differently to null packets, revealing closed vs. open ports.-T5 for insane timing, reduce the port range (-p 1-1000), and use --min-rate to set a minimum packet rate. But be careful — faster scans are louder.11. Conclusion
Network reconnaissance is the cornerstone of offensive security. In this guide, we’ve moved from theory to practice, building a complete lab with Kali Linux and Windows, executing a successful Nmap scan, and analyzing the results. The open ports (139, 445) and the Windows OS fingerprint are classic findings that would guide the next steps of a penetration test.
More importantly, you’ve learned the why behind each step: why we ping, why we use -Pn, why version detection matters, and how to interpret the output. This foundation will serve you whether you’re securing your own network, studying for a certification, or conducting authorized penetration tests.
Remember that reconnaissance is an iterative process. A single Nmap run rarely tells the whole story. Combine it with OSINT, different scan types, and manual probing to get a complete picture. And always, always operate with permission.
Ready to go deeper? Explore the Nmap documentation, experiment with NSE scripts, and try scanning different services like HTTP, SSH, or RDP in your lab. The more you practice, the more intuitive network recon becomes.
 Further Reading & Resources
Expand your knowledge with these hand‑picked resources. They cover identity management, cloud security, Azure, and more — all relevant to modern security operations.
 Internal Resources (CloudKnowledge.in)
- Okta Password Reset – Best Practices
- Device Management in Entra ID
- Entra ID Provisioning – Ultimate Guide
- Authentication Policies in Okta
- PowerShell Network Troubleshooting
External Resources
- YouTube – Cloud Knowledge Channel
- Cloud Knowledge Blog
- Medium – Okta Interview Guide 2026
- Medium – Deep Dive: Azure Kubernetes Service (AKS)
- Tumblr – Okta & IAM Interview Prep
- Tumblr – Entra ID Provisioning Guide
- AWS Security Best Practices – 7 Proven Tips
- Entra ID Provisioning – Blog
Disclaimer: All scanning activities described in this guide were performed in an isolated lab environment with explicit authorization. Always obtain written permission before scanning any network or system that you do not own.


Comments
Post a Comment